

Creating connections
Creating an EHR connection links your EVAL account to your electronic health record system. The process follows a consistent pattern regardless of which EHR you use: select your vendor, configure the connection through a guided discovery wizard, and save. EVAL validates compatibility with your EHR server during the discovery step, so you’ll know immediately if something needs attention.
Navigate to EHR in the CONFIGURATION section of the sidebar, then click New Connection.
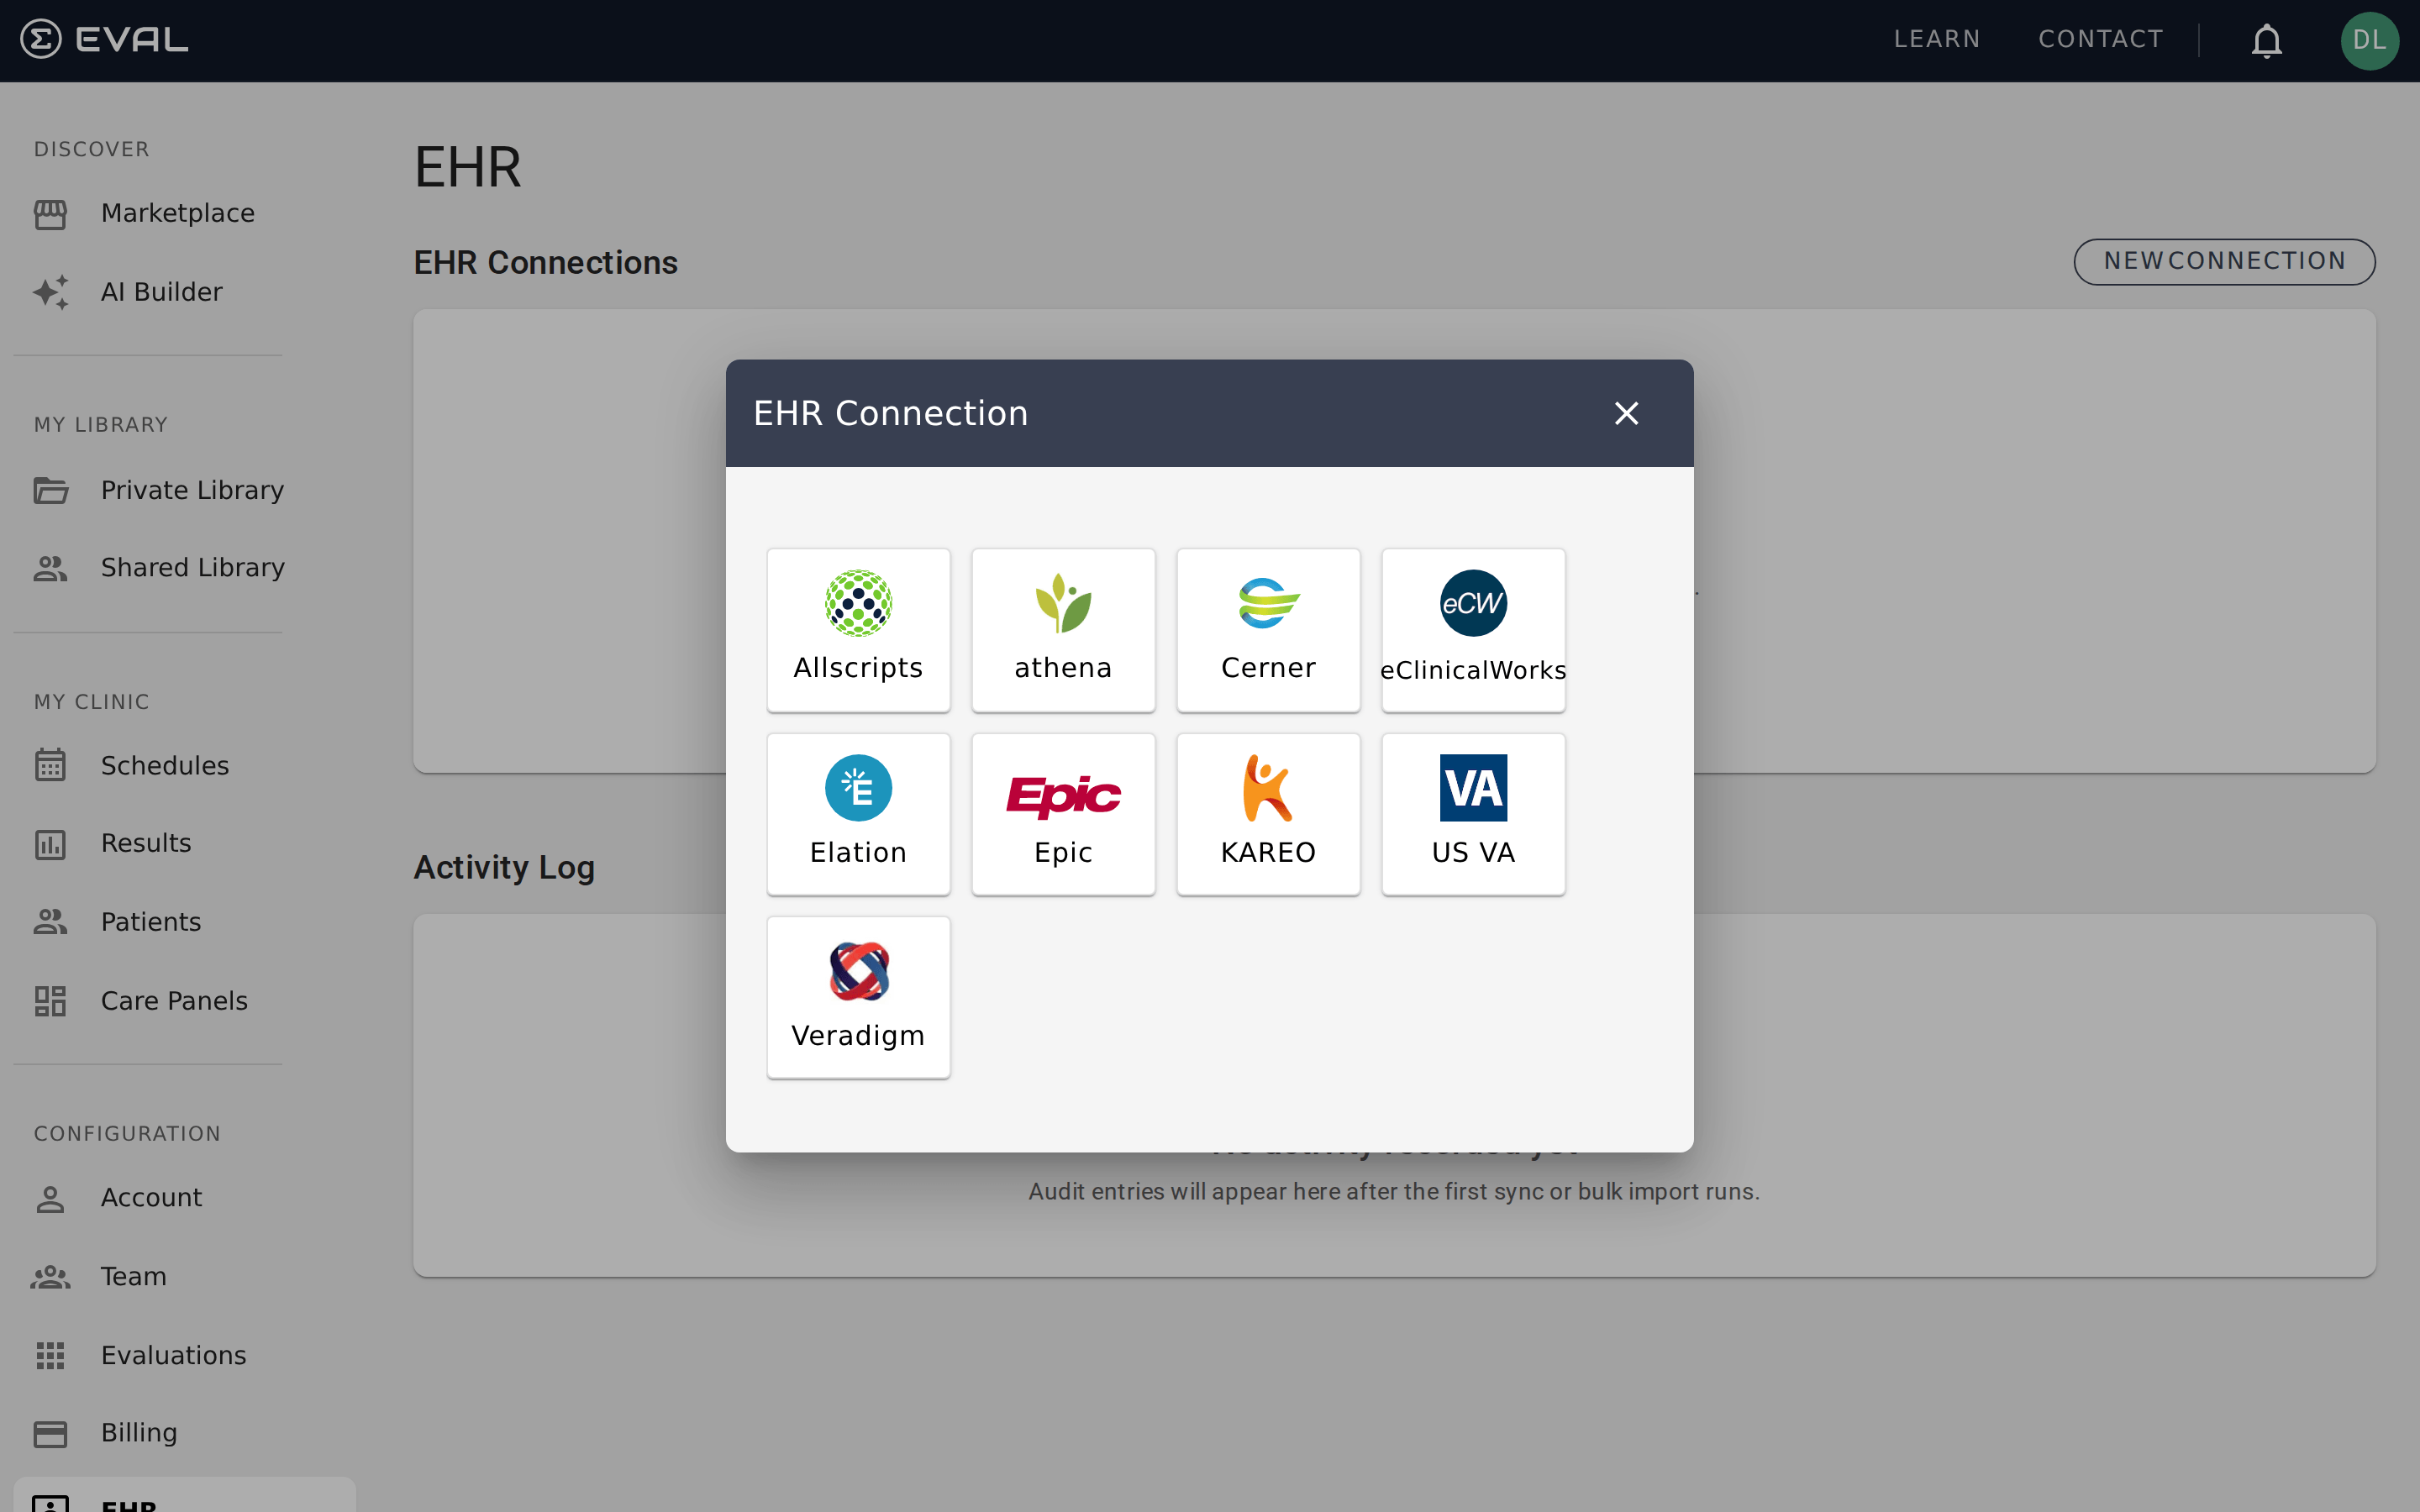
Selecting your EHR vendor
Section titled “Selecting your EHR vendor”The EHR Connection dialog presents a grid of supported EHR systems, each with the vendor’s logo for easy identification: Allscripts, athena, Cerner, eClinicalWorks, Elation, Epic, KAREO, US VA, and Veradigm. Click the vendor that matches your EHR to begin the connection setup.
If your EHR system isn’t listed, check with your EVAL representative — additional vendors may be available or in development. Any EHR that supports FHIR R4 and SMART on FHIR can potentially integrate with EVAL.
The discovery wizard
Section titled “The discovery wizard”After selecting a vendor, EVAL opens the Service Discovery panel. This is where you tell EVAL how to find and communicate with your EHR’s FHIR server.
Protocol
Section titled “Protocol”The Protocol dropdown selects the communication standard. For most vendors, this is HL7 FHIR — the healthcare interoperability standard that all supported EHR systems use. Some vendors offer additional protocol options (for example, athena supports both HL7 FHIR and its native AthenaOne protocol).
Service Base URL
Section titled “Service Base URL”The Service Base URL is the FHIR endpoint for your EHR instance — the address that EVAL uses to communicate with your EHR server. Obtain this URL from your EHR’s technical support or IT administration team. It typically looks like https://fhir.your-ehr.com/api/FHIR/R4.
For several vendors — Epic, Cerner, eClinicalWorks, Elation, and Veradigm — a directory lookup appears above the Service Base URL field. Start typing your clinic or organization name and select it from the results to fill in the FHIR endpoint automatically. If your practice doesn’t appear, or you already have the exact endpoint, type or paste the Service Base URL directly.
Connection usage
Section titled “Connection usage”The Connection Usage radio buttons determine how this connection will be used:
Launch or Single Sign-On (SSO)
Select this option if clinicians will launch EVAL from within the EHR interface or sign into EVAL using EHR credentials. This mode enables interactive clinical workflows where the EHR passes patient context to EVAL automatically.
Background Service
Select this option if this connection should synchronize patient data in the background without user interaction. Background Service connections support bulk import of patient demographics and automated chart refresh — keeping your EVAL patient records current with your EHR data.
After filling in these fields, click Search to validate the connection. EVAL contacts your EHR server, verifies FHIR compatibility, and confirms the available capabilities. If the discovery succeeds, you can proceed to save the connection with a display name.
Vendor-specific notes
Section titled “Vendor-specific notes”While the connection flow is consistent across all vendors, a few systems have unique configuration options.
Epic connections use standard FHIR discovery. Enter the FHIR Base URL provided by your Epic administrator (typically found in Epic’s App Orchard or your organization’s Epic technical documentation). Epic supports both Launch/SSO and Background Service connection modes.
Cerner (Oracle Health)
Section titled “Cerner (Oracle Health)”Cerner connections follow the same pattern as Epic. Your Cerner administrator provides the FHIR endpoint URL, which EVAL uses for discovery. Cerner supports EHR Launch, SSO, and Background Service modes — a single Cerner connection can support multiple modes simultaneously.
athena (athenahealth)
Section titled “athena (athenahealth)”Athena connections have two unique options not found in other vendors:
Environment selection — athena offers Production and Preview environments during discovery. Use Preview for testing and validation before connecting to your production data. The Service Base URL is pre-populated based on your environment selection.
Protocol choice — in addition to standard HL7 FHIR, athena supports its native AthenaOne protocol. Choose the protocol that matches your organization’s integration requirements — HL7 FHIR is recommended for most use cases as it provides the broadest compatibility.
Athena connections also require a Tenant ID (your athena practice identifier), which appears on the connection detail page after creation.
eClinicalWorks
Section titled “eClinicalWorks”eClinicalWorks connections follow the standard FHIR discovery pattern — use the directory lookup or enter the Service Base URL from your eClinicalWorks technical contact, then choose your Connection Usage. eClinicalWorks presents three separate usage options: eClinicalWorks Launch, Single Sign-On (SSO), and Background Service.
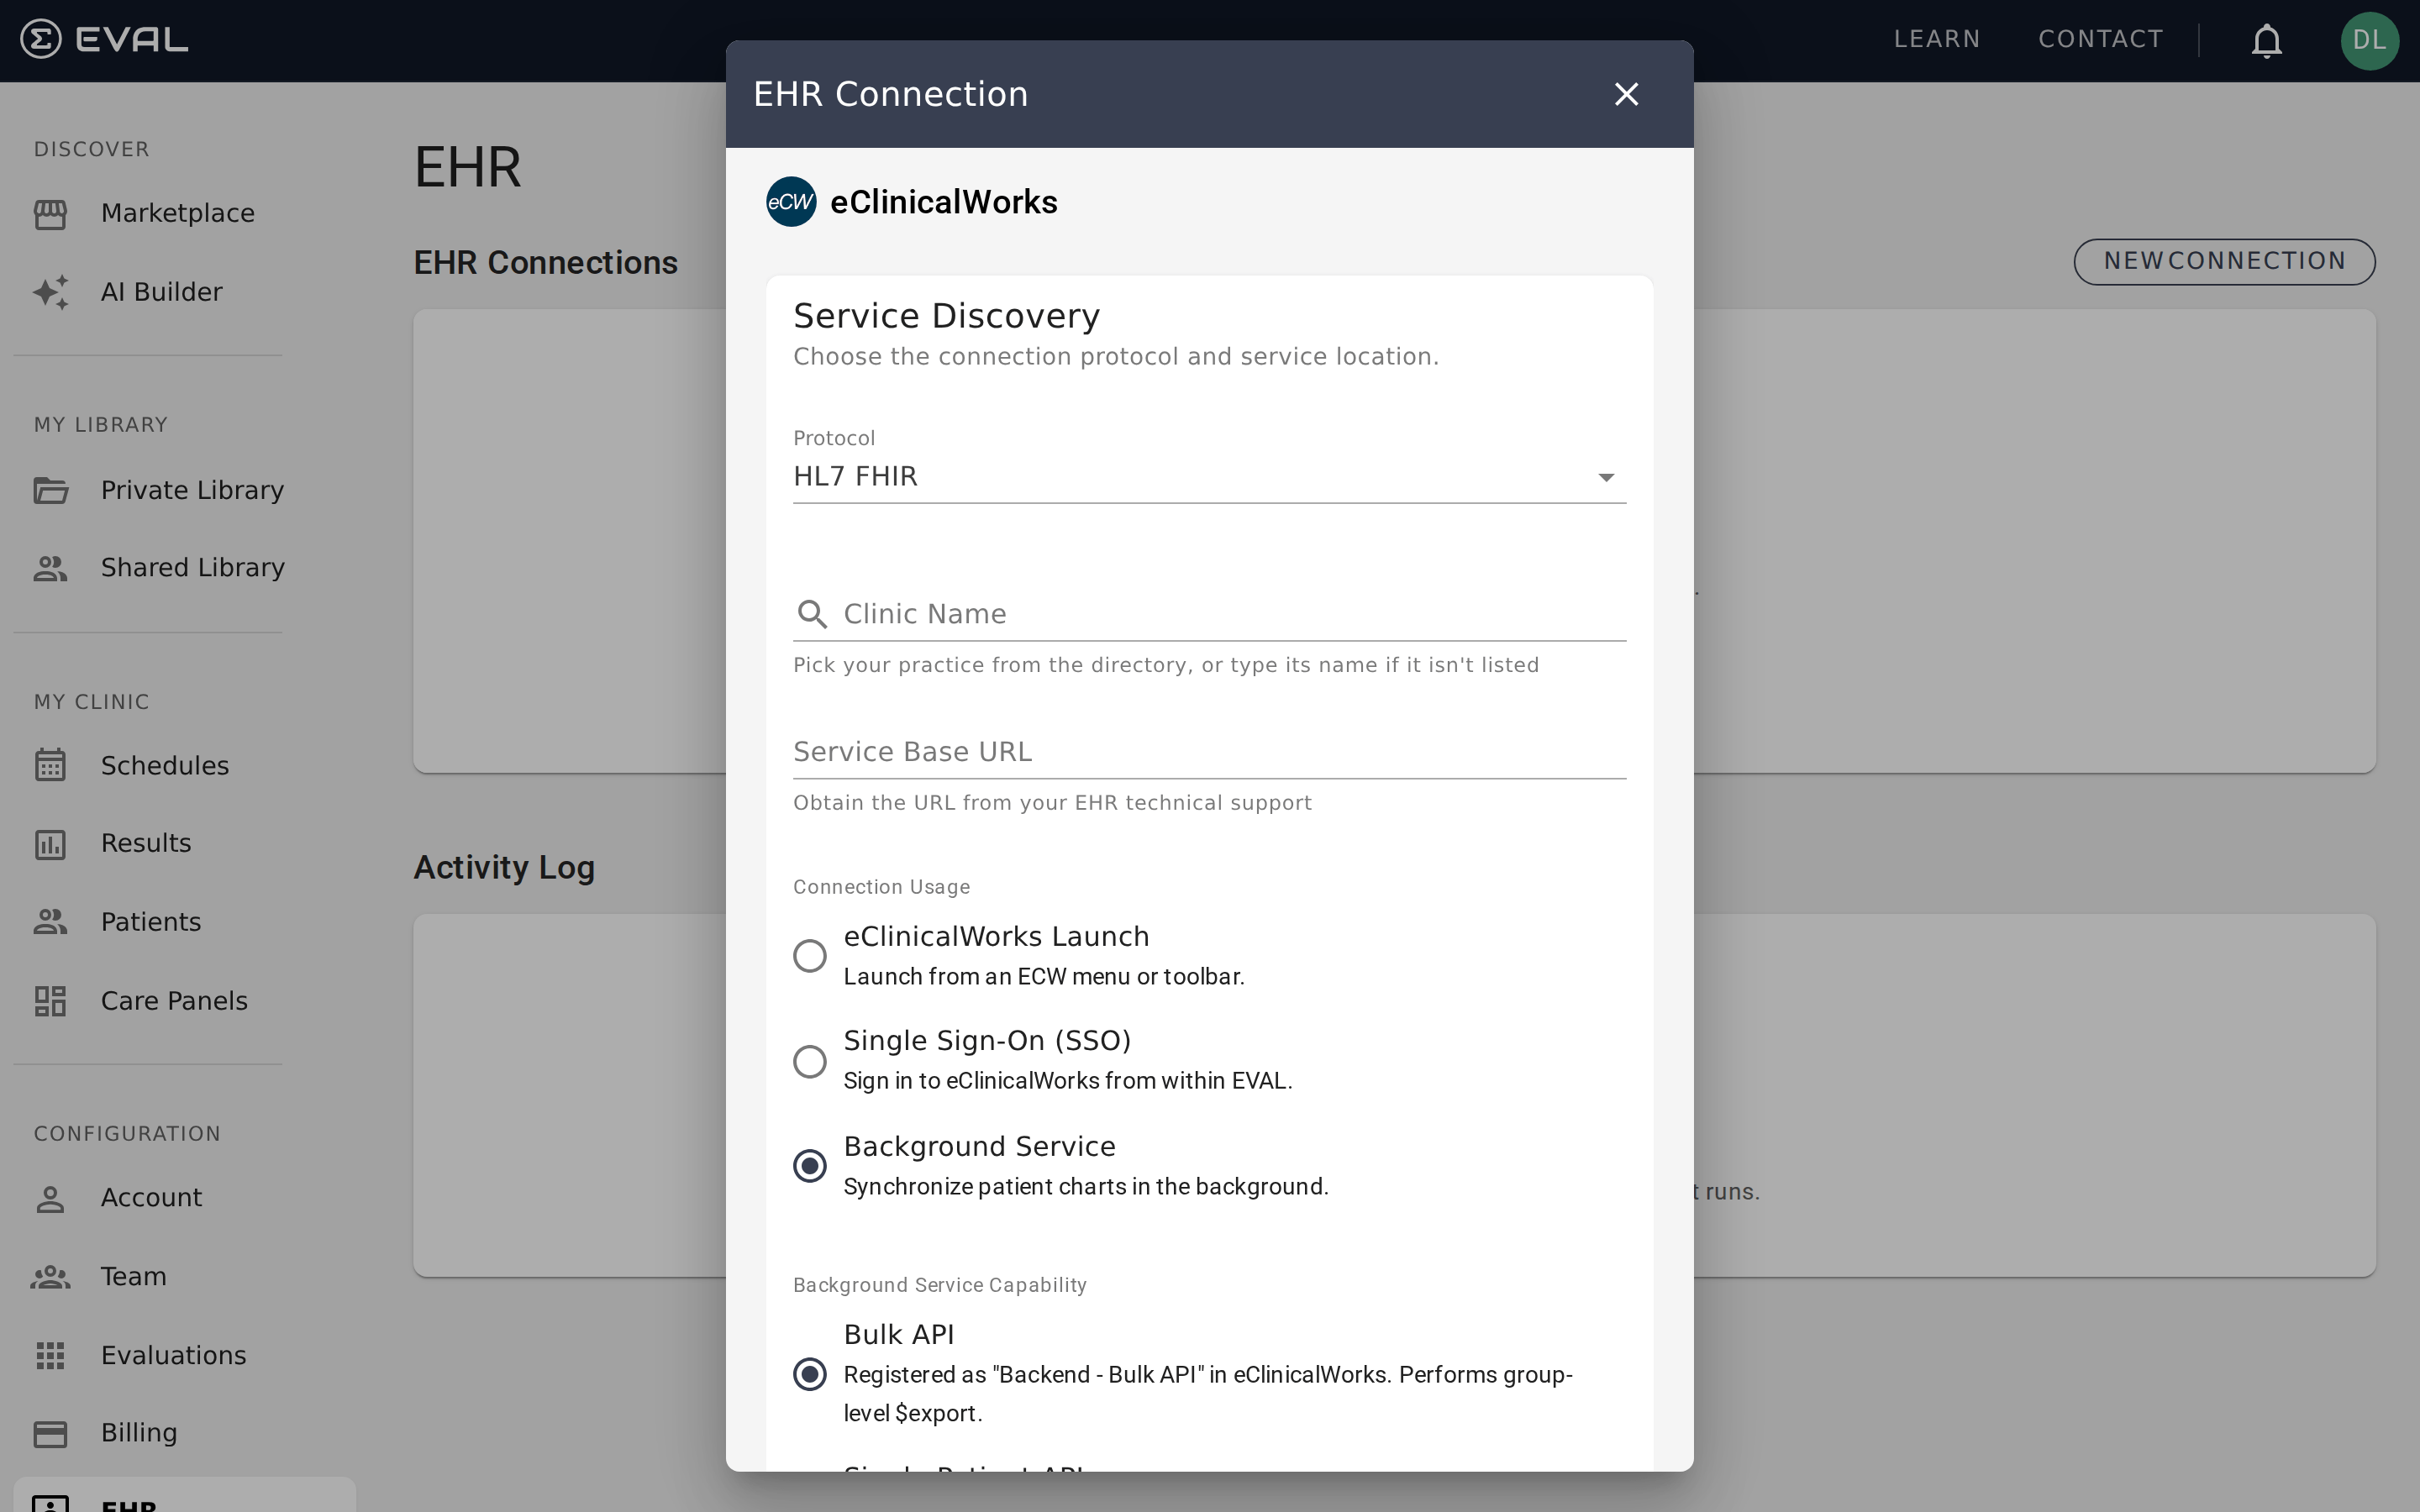
When Connection Usage is Background Service, a second set of radio options appears under Background Service Capability: Bulk API or Single Patient API. eClinicalWorks separates these capabilities into different backend apps, so one connection can only do one of the two:
- Bulk API registers as Backend - Bulk API in eClinicalWorks and performs group-level
$export— this is the one to choose for bulk imports. - Single Patient API registers as Backend - Single Patient API and performs per-patient FHIR reads for ongoing chart sync.
After discovery, the eClinicalWorks configuration screen shows an Installation Instructions panel with the App Name and an EHR Activation Code. Your eClinicalWorks administrator uses these identifiers to register and activate the EVAL Health app inside the eClinicalWorks FHIR app marketplace. Use the Copy buttons to hand these values to whoever manages your eClinicalWorks backend apps.
To use both capabilities for the same eClinicalWorks practice, create two Background Service connections — one with Bulk API and one with Single Patient API. The two connections can share the same Service Base URL and each appears independently in your EHR Connections list. After both are created, see Managing connections to configure the Bulk Import card on one and the Patient Sync card on the other.
Elation
Section titled “Elation”Elation also presents three separate usage options — Elation Launch, Single Sign-On (SSO), and Patient Sync. Use the directory lookup or enter the Service Base URL from your Elation technical contact, then select the mode that matches your workflow. Elation Launch and SSO map to Elation’s interactive app, while Patient Sync maps to its read-only Backend Services client for background chart synchronization.
Allscripts, KAREO, US VA, Veradigm
Section titled “Allscripts, KAREO, US VA, Veradigm”These vendors follow the standard FHIR discovery pattern. Enter the Service Base URL from your vendor’s technical documentation and select your connection usage mode. No vendor-specific fields are required beyond the standard discovery form.
What happens during discovery
Section titled “What happens during discovery”When you click Search in the discovery wizard, EVAL performs a technical handshake with your EHR server to validate compatibility and gather configuration details.
The FHIR handshake
Section titled “The FHIR handshake”EVAL contacts the Service Base URL and fetches the server’s FHIR metadata — a standardized document that describes the server’s capabilities, supported resource types, and authentication requirements. This tells EVAL whether the server supports the FHIR R4 standard and which clinical data types (patients, conditions, medications, etc.) are available.
SMART configuration
Section titled “SMART configuration”For connections that use Launch or SSO mode, EVAL also discovers the server’s SMART on FHIR configuration — the OAuth2 authorization and token endpoints that handle secure authentication. This determines how clinicians will authenticate when launching EVAL from within the EHR, including whether the server supports modern security features like PKCE (Proof Key for Code Exchange).
Why discovery fails
Section titled “Why discovery fails”Discovery failures almost always point to one of three issues: an incorrect Service Base URL (the most common cause), a FHIR endpoint that isn’t accessible from your network (firewall or proxy restrictions), or an EHR server that hasn’t fully enabled its FHIR R4 interface. The error message in the discovery wizard indicates which step failed, helping your IT team diagnose the problem.
After creating a connection
Section titled “After creating a connection”Once saved, your new connection appears in the EHR Connections list on the main EHR page. Each connection shows the vendor logo, connection name, EHR system name, FHIR version, and connection type. Click any connection to view its detail page, where you can configure additional settings like bulk import and patient sync schedules.
For Background Service connections, you’ll want to configure the bulk import and patient sync settings next to start synchronizing patient data.