

Set up a care panel
Care Panels are how you manage groups of patients who share a common clinical program — a diabetes management clinic, a pre-surgical screening program, or a research cohort. In this tutorial, you’ll create a Care Panel from scratch, populate it with patients, set up a recurring assessment schedule, and configure notifications so you know when results need attention.
By the end, you’ll have a fully operational panel that your team can use to track outcomes across a patient population.
Prerequisites: A Clinical Team or Enterprise account, at least three patient records in your system, and at least one published evaluation in your library (the PHQ-9 from the previous tutorial works well).
Time: 15–20 minutes.
Create the panel
Click Care Panels in the sidebar under My Clinic. You’ll see the Care Panels list showing any existing panels with their names and visibility (Shared or Private). Click + New Panel in the upper right to create a new one.
Enter a descriptive name — for this tutorial, use “Depression Screening Program.” Choose Shared visibility so other team members in your organization can access the panel. Shared panels are ideal for team-based programs where multiple clinicians need to review results and manage patients.
You can optionally set default evaluations, which permanently filter the Results tab to show only results from specific assessments. For a focused screening program, add your PHQ-9 evaluation as a default — this keeps the panel’s results view clean by filtering out unrelated assessment data. See Creating and configuring panels for all configuration options.
Add patients to the panel
Once the panel is created, you’ll land on the panel’s detail view with tabs for managing results, patients, schedules, and settings. Click the Patients tab, then click Add Patients. EVAL shows a searchable list of all patients in your organization. Select three or more patients and confirm your selection.
The patients appear in the panel’s patient list. Each patient card shows their basic demographics and, once results start coming in, a summary of their most recent assessment status.
Set up a recurring schedule
Switch to the Schedules tab within your panel. Click Add Schedule to create a new assessment schedule. Configure it as follows:
- Evaluation: Select your PHQ-9 (or whichever evaluation you want to use)
- Frequency: Every 2 weeks (biweekly is common for depression monitoring)
- Communication method: Choose how patients are notified — email, SMS, or both
- Start date: Today
- End date: Leave blank for ongoing monitoring, or set an end date for a fixed-duration program
The schedule applies to all patients currently in the panel. When the scheduled time arrives, EVAL sends the evaluation to each patient through the communication method you selected. See Scheduling assessments for the full range of scheduling options.
Configure result notifications
You want to know when a patient scores in a concerning range. Click the Settings or notification configuration area for your panel. Set up a notification rule:
- Trigger: When a result arrives with a priority level of Urgent or Critical
- Notify: You (and optionally other team members)
- Method: In-app notification and email
Priority levels are determined by the evaluation’s result configuration — if your PHQ-9 maps scores of 15+ to Urgent and 20+ to Critical, you’ll be notified whenever a patient scores in those ranges. See Notifications and alerts for all notification options.
Review incoming results
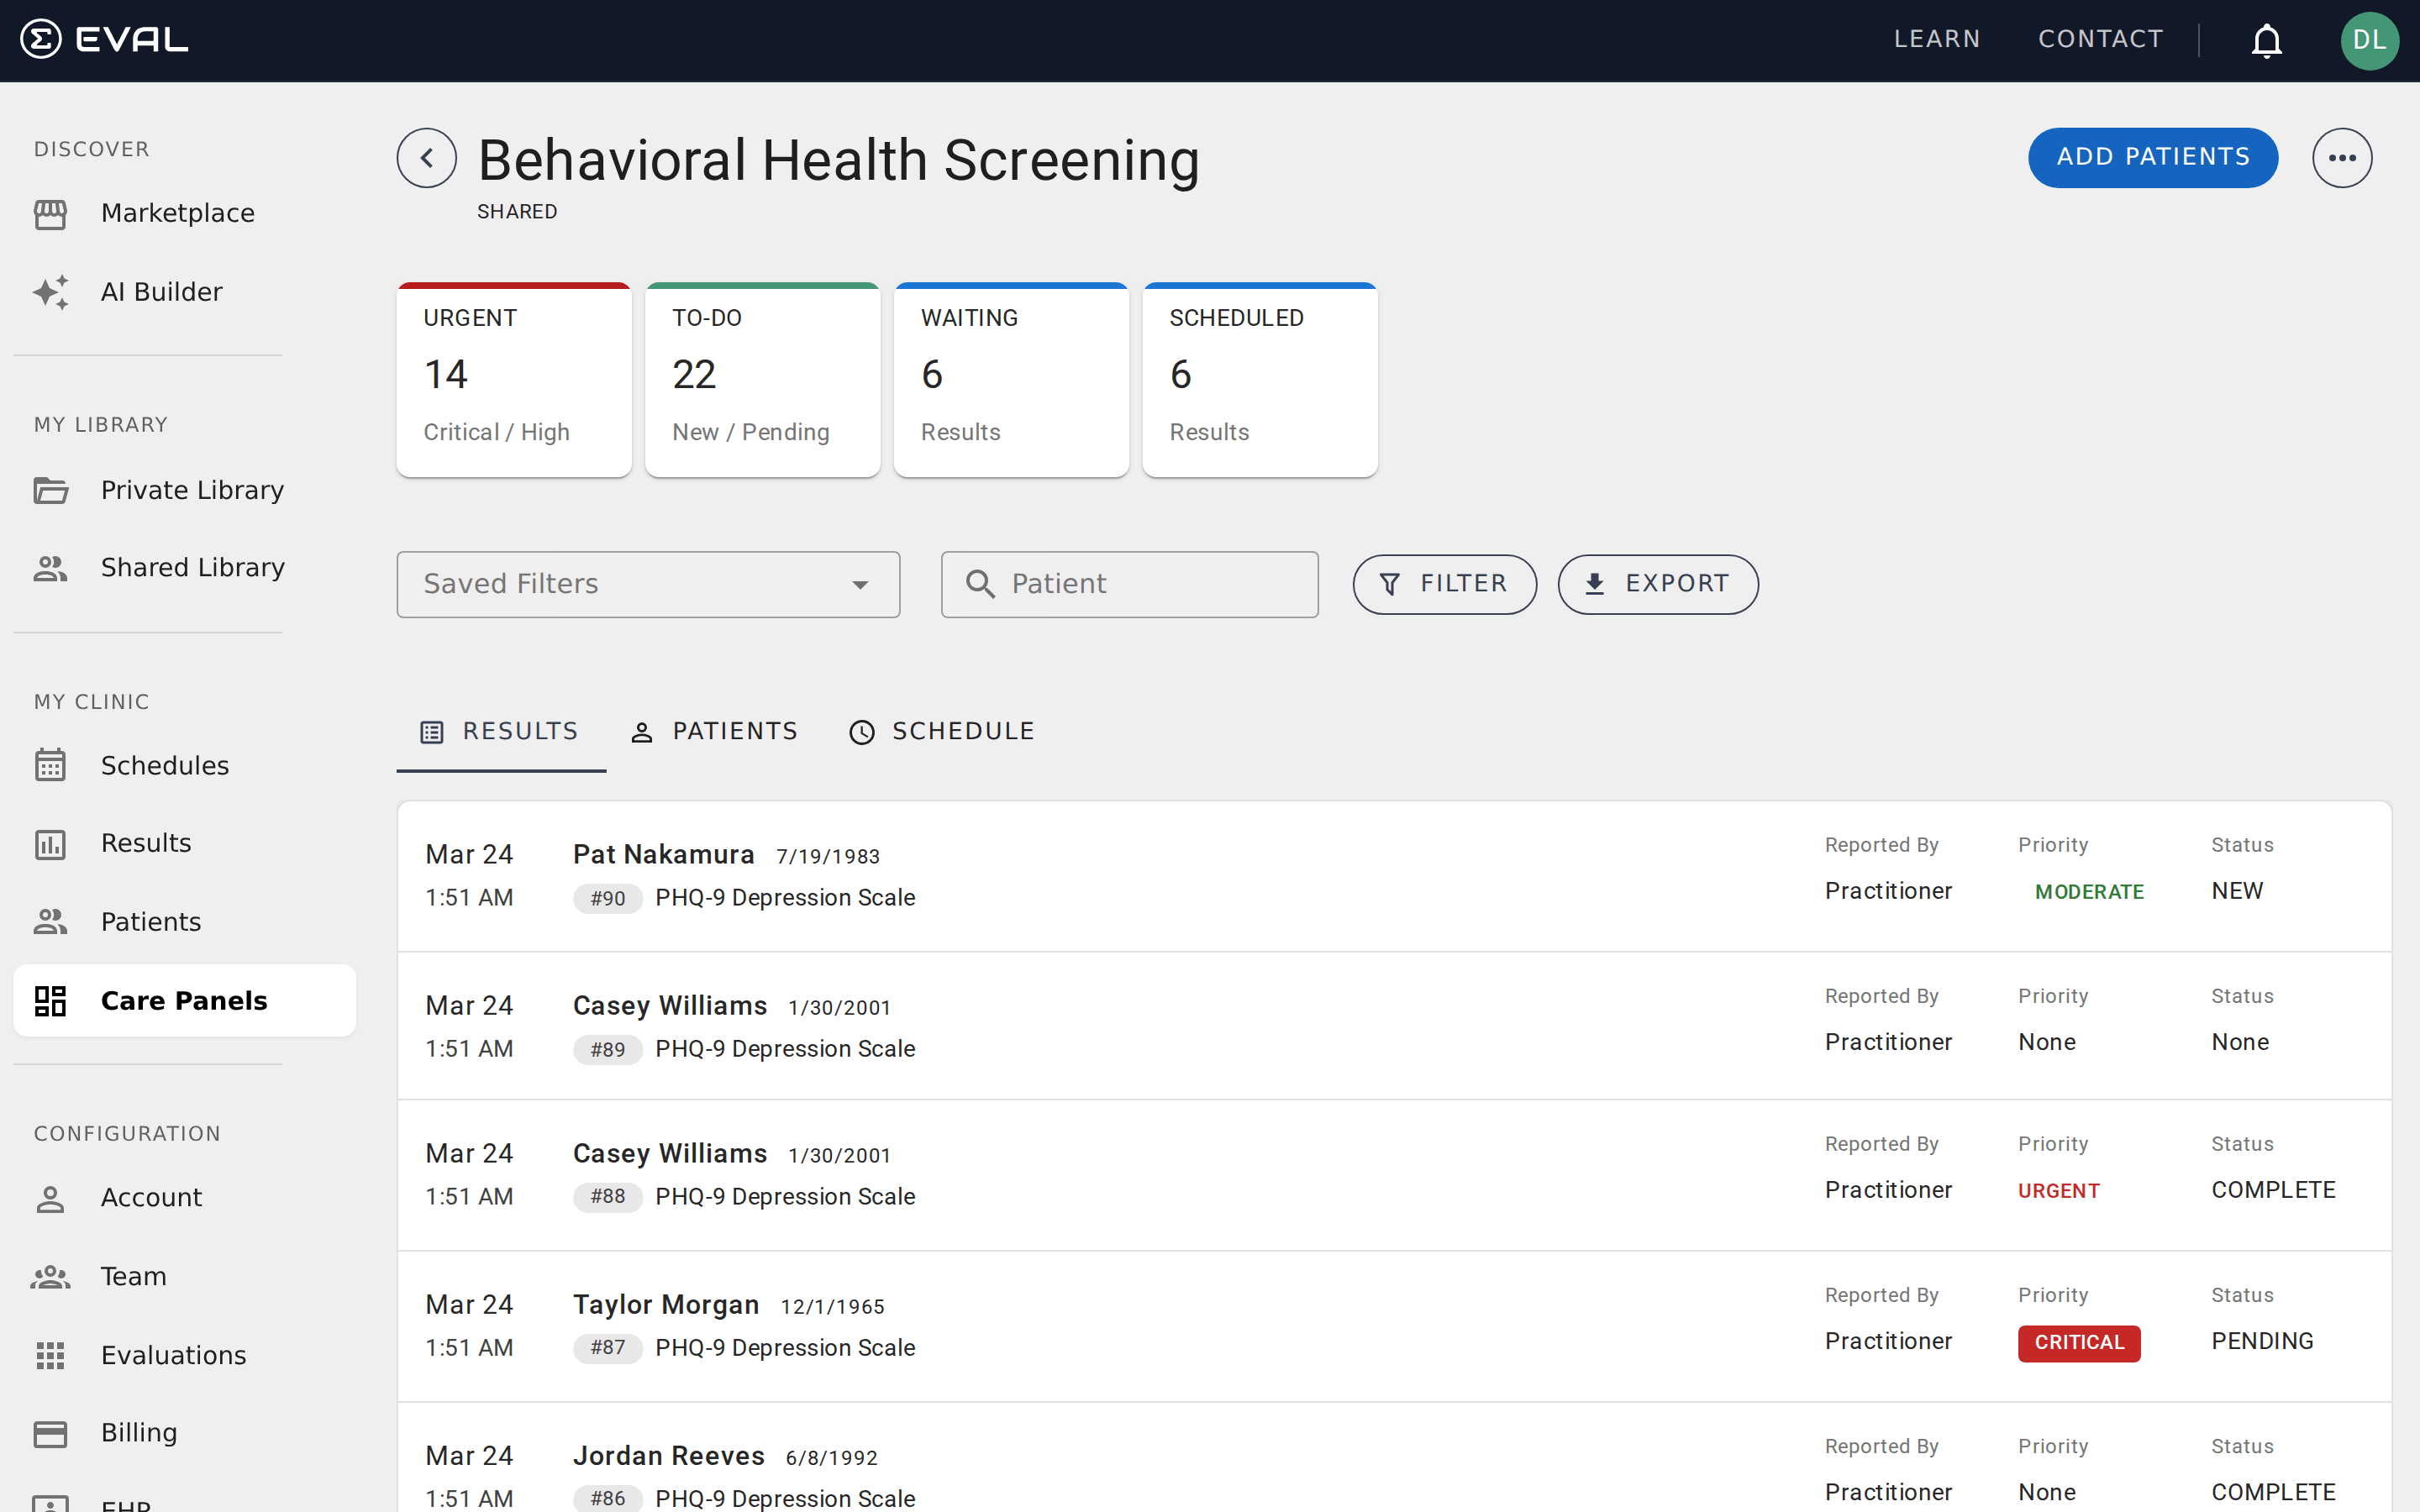
As patients complete their assessments, results appear in the panel’s Results tab. Each result shows the patient name, evaluation name, score, priority level (displayed as a colored badge), and status.
New results arrive with a New status. Your clinical workflow typically involves:
- Opening the result to review the full details
- Assessing whether clinical action is needed
- Marking the result as Reviewed or adding a clinical note
- For concerning scores, following up with the patient
Use the filter toolbar to focus on specific priorities (e.g., show only Urgent and Critical results) or statuses (e.g., show only New results that haven’t been reviewed). See Tracking results for details on priority levels and the review workflow.
Export data for reporting
If you need to analyze your panel’s data outside EVAL — for a research study, a quality improvement report, or clinical documentation — click the Export button in the Results tab toolbar. EVAL generates a spreadsheet with all result data for the current view, respecting any active filters you have applied.
The export includes patient identifiers, evaluation names, scores, priority levels, statuses, and timestamps. For research studies, this data can feed directly into your statistical analysis pipeline. For clinical programs, it provides the documentation you need for quality metrics and accreditation reporting.
See Filtering and exporting data for export options and file format details.
What’s next
Section titled “What’s next”Your Care Panel is now operational. Here are ways to extend it:
- Share with colleagues — Adjust the panel’s sharing permissions to give specific team members access. See Panel visibility and Panel roles and permissions.
- Add more evaluations — A single panel can track multiple assessments. Add a GAD-7 anxiety screen alongside your PHQ-9 to get a broader picture.
- Set up public intakes — Let patients self-enroll through a public link, useful for research recruitment or community screening events. See Collecting responses.
- Refine your filters — Save commonly used filter combinations for one-click access. Teams often create saved filters like “Needs Review” (status = New, priority = Urgent+) and “This Week” (date range = last 7 days).